Sunday, December 27, 2015

Paul's January 2016 Fly of the Month

Dubbed Egg Fly


Hook:  Favorite egg hook – this can be a regular nymph hook, egg hook/glo bug hook, or TMC 2487. 
Tying thread:   Florescent orange thread or thread color of choice.
Tail/trailing milt:  White Glo bug yarn.  (I sometimes use CDC feathers)
Egg:  Cheese Glo bug yarn or color of choice.
Eggs, eggs, eggs!!!  In the late fall & winter, if I’m nymphing, one of my flies is almost always an egg.  If you’re a steelhead fisherman you already know about how productive egg patterns are.  Trout and steelies love them because there’s so much nutrition in one bite.
There are many techniques for tying an egg pattern.  This is one of my favorites.  It’s fast and easy. What I also like about it is that you can create an egg of a very specific size.  Rather than lashing the glo bug yarn on the hook – raising, twisting and then cutting it, you are going to “dub” the glo bug yarn onto your hook.  Before you do this you are going to create your egg dubbing with a coffee grinder.  I’m going to show my age here a little bit.  Long before we had such a broad variety of commercially prepared dubbings, many of us fly tyers would use a coffee grinder to create our own dubbing concoctions.   That’s exactly what we are going to do here.  We are going to make a dubbing mixture out of glo bug yarn. 
Begin by taking a strand of glo bug yarn.  Spread and flatten it out.  Cut off small pieces (approximately ¼ inch) of bug yarn into a small pile.  Place the chopped pieces of yarn into the coffee grinder and grind away to form a nice dubbing blend.  You can customize it anyway you want.  If you want to add a little flash throw some angel hair or tinsel of choice into the mix.  With your dubbing mix prepared, your now ready to start your fly.
Start your thread behind the eye of the hook and wind down to about the half way point of your hook shank.  Bring the thread back up to the eye.  Next, you are going to prepare your trailing milt tail.  Take a strand of white glow bug yarn.  Divide it into 3 strands of material.  Take one newly created strand and fold it in half over your thread.  You are going to “double” it on top of the hook shank and wrap over it with your thread.  You are now going to dub your egg.  Dub your egg with the glo yarn dubbing you created.  It’s very easy to dub a ball on your hook shank.  Don’t dub the egg too tight.  You want it to remain somewhat translucent.  Make sure all your thread wraps are covered and not exposed.  Next, create an orange head at the front of the fly.  Apply head cement.  Finally trim and cut your milt tail approximately at the bend of the hook.
Below is a great instructional video from www.toflyfish.com .
If you have any questions about this fly or would like to submit a Fly of The Month I can be reached at 203 305-3850 or e-mail me at pdinice@frontier.com  .


Monday, November 16, 2015

Paul's December 2015 Fly of the Month

Baby Rainbow Streamer


Hook:  Size #10 Daiichi 1260 streamer hook.

Tying thread:   Red thread.

Bead:  1/8” multi hued rainbow bead.

Tail:  Two dun saddle hackles (I get them off a dry fly neck).

Body:  Metallic embroidery thread – a mixture of green, bronze, gold.

Lateral line/side wing:  Senyo Wacko Hackle rainbow mix.

Rib:  Red ultra-wire brassi size.

Hackle/collar:  Dun saddle hackle.

Head:  Peacock Ice dub
A couple of years ago I wrote up a Fly of the Month called the “Goldie”.  It is anything but a traditional streamer, but boy does it catch fish.  The Rainbow Trout is similar in that it has a lot of flash and is also a non-traditional tie.  If neither fly appeals to you, you just don’t know what your missing.  Getting back to the flash on the Baby Rainbow, I’m sure it resembles a rainbow fry to hungry trout.  Just a great use of materials to do that.

The fly was developed by Shawn Holsinger of Holsinger’s Fly Shop.  I’ll have more information on Holsinger’s at the end of this pattern recipe.  Shawn does best with this fly dead drifting it with his nymph rig.  I’ve done best fishing it with two other flies in a wet fly rig.  It’s all good and it all works.  See what works best for you.

Begin by placing your bead on the hook.  Start your thread approximately 1/3 the length of the hook shank behind the bead.  (The first 1/3 of the hook shank will be used for the collar and head of the streamer).  Layer it to the bend of the hook.  Tie in 2 medium dun saddle hackle to form the tail.  The length of the tail should be about the length of the hook shank.  They are tied on each side of the hook shank.  Tie them in one at a time.  The feathers should be tied in so that they face each other and form a uniform tail.  Save the base of the feather.  You’ll use it for your collar later.

Next tie in your red ultra-wire which will be used for your rib.  Tie in your metallic embroidery thread.  Like Shawn, I got mine from a craft store.  Palmer the metallic thread forward to create a uniform body, making sure to leave the first 1/3 of the hook shank free.  Next, you’re going to tie in your lateral lines.  You can use Senyo Wacko Hackle or rainbow metallic embroidery thread.  Tie in one piece of material to create a lateral line on each side of the hook shank.  Once the lateral line is tied in, trim it off so that it extends back midway to the feather tail.  Now your going to tie in your collar wetfly style.  Tie it in by the tip.  Take a couple wraps stroking the fibers to the rear of the fly.  Tie it off and wrap your thread back towards the hackle so that it lays back towards the end of the hook.  Finally, dub a head with peacock ice dub.  It’s approximately 5-6 wraps of dubbing.  Tie off behind the bead, apply some finish cement to your finish wraps and you’re done.  
There is a great instructional video by Shaun Holsinger below:
I strongly recommend visiting Holsinger’s Fly Shop Website at http://www.holsingersflyshop.com/ .  The site has some great instructional fly fishing and tying videos.  They carry a ton of great tying supplies.  Located in East Freedom, PA they can be reached at 814 710-7553. 

This fly can also be viewed at the Housatonic Fly Fishermen’s Facebook page and www.tightlinesflyfishing.blogspot.com .  If you have any questions about this fly or would like to submit a Fly of The Month I can be reached at 203 305-3850 or e-mail me at pdinice@frontier.com .

Thursday, November 12, 2015

Fishing the Hous November 11, 2015


Novemeber 11, 2015 --- It's Scud Time! 


Dan battles a feisty Hous Rainbow


     November is one of my favorite times to fish the Housatonic.  Most years scuds in the river become extremely active.  As my friend Dan says "the insect life winds down and the trout really key on the scuds".  Another reason why I like fishing in November is to fish with good friends.  I've been fishing the past few years with 'scud afficionado' Dan Kenny.  This year we were joined by two great and experienced fly fishermen, Will Stone & Mike Shannon.  It was a nasty morning when we all arrived early on the Hous.  Really raining and gusty winds around 8:30 a.m.   Then the rain stopped and the wind laid down.  It was a perfect late fall fly fishing day.   The fishing wasn't easy but we all caught fish on a variety of flies including scuds, wet flies, streamers, and some olive dries.  It was just a great day to enjoy the river and celebrate friendships.

Friday, October 30, 2015

Paul's November 2015 Fly of the Month

Rainbow Warrior

(and variation Dragon Warrior)


Hook:  Tiemco 2487  Size #14-#20. 

Tying thread:   Red 8/0 or UTC 70.

Bead:  Rainbow bead, glass bead, or bead of choice.

Tail:   Pheasant tail fibers.

Body:  Pearl mylar tinsel, flashabou, or ribbon. (Black halographic tinsel for the Dragon Warrior).

Thorax:  Rainbow Sow Scud Dubbing.

Wing Case:  Pearl mylar tinsel, flashabou, flash back material or ribbon.

This was developed by Mr. Lance Egan of Utah.  It was made to be fished on tail water fisheries.  At times I’ve had remarkable success with it on the Farmington River.  It works great all year round but I’ve had most success when sulphers are on the water.  Many fly fishermen have success with it in the winter months.  

There are a few things that I love about this fly.  First is the iridescent pearl body.  The red thread really sheens through the body.  It acts as a beacon that says “eat me” to fish.  I’ve previously fished and had success with other pearl body nymphs such as “Lightening Bugs”.  There’s something about it that just attracts fish.  If you  substitute black holographic flashabou for the pearl, you’ve got a “Dragon Warrior”.  That pattern tied in smaller sizes has also worked well for me.  I also love the little band of red thread (“hot spot”) behind the bead.  Finally, what’s not to like about pheasant tail fibers for a tail.  I almost always fish this nymph in a two fly rig. 


To begin tying this fly, place your matching bead of choice on the hook.  In keeping with the name of the fly, and based on previous experience, I use a “rainbow” bead.  These beads have different multi colored hues which reflect light.  I think they give a much more natural presentation and something different that trout can’t recognize.  Sometimes that is extremely important on a tail water like the Farmington where the fishing pressure on the resident fish is off the charts.  At one time “rainbow” beads were difficult to find and purchase.  They have really caught on with fly fishers and are now readily available in most fly shops. 

Next, lay down and cover the hook shank with your red thread to form a slender and uniform body.   Then tie in 3-4 pheasant tail fibers for your tail.  Now tie in your pearl mylar tinsel or flashabou.  Advance your thread to just behind the bead.  Palmer your tinsel forward to create the body of the fly.  Tie it off on top of the nymph but do not cut off the tag end.  You are going to use it for a wing case after you dub your thorax.  Dub a thorax with tan sow scud rainbow dubbing.  Pull your mylar wing case over the thorax and tie and cut it off just behind the bead.  Make a few wraps with your red thread behind the bead.  Tie and cut it off.  You can apply some head cement to the wraps or give the wing case and wraps a coat of U.V. resin or 5 minute epoxy. 

There is a great instructional video by Tim Camissa on how to tie the Rainbow Warrior below:
If you have any questions about this fly or would like to submit a pattern of the month I can be reached at 203 305-3850 or e-mail me at pdinice@frontier.com . 

Wednesday, September 23, 2015

Paul's October 2015 Fly of the Month

Slumpbuster - A John Barr Streamer


Hook:  TMC 5262 Size #2-#10. 
Tying thread:   3/0 olive Monocord.

Cone:  Silver or gold, brass or tungsten sized to match hook size.
Weight:   Lead wire, sized to hook.
Rib:  Brassie sized chartreuse ultra-wire.
Body:   Silver Body Braid/Ribbon.


Wing:  Olive Pine Squirrel Zonker Strip.

Collar:  Olive Pine Squirrel Zonker Strip wrapped hackle style.
This is a big fish fly.  One of the top reasons why I like it.  Its originator is John Barr of Copper John fame.  Although this pattern calls for pine squirrel for the zonker strip, I’ve used rabbit.  The pine squirrel is a little stiffer and shorter, definitely a preference for smaller flies.  The rabbit seems to work well on larger ones. 

Begin by sliding the cone onto the hook and insert in your vise.  Make approximately 10-15 wraps of lead around the hook shank.  Slide it up against the inside of the cone to lock it in place.  Begin your olive thread at the end of the lead wraps.  Cover them and wrap down to the bend of the hook forming a uniform slightly tapered body.  Then coat the wraps with ‘hard as nails.   At the bend of the hook tie in your ribbing material.  Next tie in your body braid material behind the cone and wrap your thread back to the bend.  Make sure the length of body braid is long enough to palmer and wrap your body.  After wrapping your body cut and tie it off behind the cone.  Next tie in your zonker wing behind the cone.  It should be approximately 1½ times the length of the hook shank. 

Slightly dampen the wing material.  Palmer and wrap the wire ribbing forward through the wing.  You can separate sections of the wing after its dampened.  Cut and tie it off at the cone.  Next, tie in another zonker strip behind the cone.  It’s going to be your hackle/collar.   Make sure you wrap the strip around the hook with the hair facing the bend of the hook.  Two or less wraps is all you’ll need.   Preen the hair fibers back towards the bend of the hook as your wrapping the collar.  After two wraps cut and tie it off.  Apply some head cement to your wraps.  Your done.  Below is a great instructional video from tighlinevideo on how to tie the Slumpbuster.

If you have any questions about this fly or would like to submit a Fly of the Month, I can be reached at 203 305-3850 or e-mail me at pdinice@frontier.com . 

Wednesday, September 2, 2015

Paul's September 2015 Fly of the Month

Napoleon’s Dynamite Jig Nymph


Hook:  Jig Hook Size #12-#18.  I use Allen Fly Fishing J100 BL hooks.
Bead:  Tungsten Disco bead or Rainbow Bead.
Weight:  .015 lead wire.
Tag:   Fluorescent Orange Thread.
Tail:  Peacock Crystal Flash – 3 strands.
Body:  Rusty Brown Thread coated with varnish.
Rib:   Chartreuse Crystal Flash.
Thorax:  Peacock and Fluorescent Orange SLF Prism Dubbing.
Collar:  Fluorescent Orange Thread.
This is one of my favorite jig head nymphs.  I’ve been nymphing with more jig head flies this past summer.  They really get down deep fast !
It’s important to note that “jig nymphs” drift with the point up.  Also, most jig patterns are tied in the “round”.  No matter what way you look at them they look the same.
I use Allen J100BL jig hooks.  They are black and barbless.  Any comparable jig hook can be used.  Be aware that the shank on a jig hook runs smaller than a traditional nymph hook. 
Begin by placing your “disco” tungsten bead on the hook.  A “disco” bead is a multi-faceted and gives off additional sparkle to your fly.  I also use “rainbow” beads for this fly.  Rainbow beads have multi-hued colors.  You can also use a bead of your choice.   Some tyers use “slotted beads” when tying on a jig hook.  I haven’t had any problem using a traditional bead. 
After your bead is on the hook, make 5-6 wraps of lead behind it.  Push it up against the bead to lock it in place.  Next take your hot orange thread and cover the hook shank.  Tie in 3 fibers of peacock crystal flash for your tail.  Next form a slim tapered body with your thread.  Tie the orange thread off.  Trim the tail to the length of the hook shank.  Tie in your rusty brown thread and wrap back along the hook shank, leaving an orange “hot spot” at the rear of the fly.   Tie in the chartreuse crystal flash to be used for your rib.  Wrap back and forth to cover all the orange thread with the exception of the “hot spot”.  Rib the fly with even wraps of the crystal flash.  Tie off your brown thread.  Next, coat the body with varnish to enhance durability and sheen.  I use 2-3 coats of ‘hard as nails’.  You can use a cement or resin of your choice.  After it dries, reattach your hot orange thread.  Tie it in behind the bead.  You’re going to dub your thorax.  You will be using two dubbings to do this.  The thorax consists of ‘two turns” of peacock SLF Prism dubbing, followed by ‘two turns’ of hot orange SLF Prism dubbing.  Now create a very small additional hot spot collar with your orange thread behind the bead.  Seal the thread with head cement.  Finally, using a piece of Velcro, brush out your collar to create a “buggy look” to your nymph. 
A gentleman by the name of Tim Cammisa has a great instructional video on how to tie this pattern below:
 If you have any questions about this fly or would like to submit a Fly of the Month, I can be reached at 203 305-3850 or e-mail me at pdinice@frontier.com . 


Saturday, May 23, 2015

Paul's June 2015 Fly of the Month

Purple Hares Ear

Hook:  Nymph Hook of choice in sizes 8-18.
Tying thread:   Uni 6/0 or 8/0 in black.  (Optional “hot spot” in orange.)
Bead:  (Optional) Rainbow bead to match hook size.
Tail:   Hare’s mask guard hairs
Abdomen:  Blended Hare’s Ear dubbing.
Rib:   Purple Ultra wire.
Thorax:  Purple Laser Dub.
Wing Case: (Optional) Black thin skin.
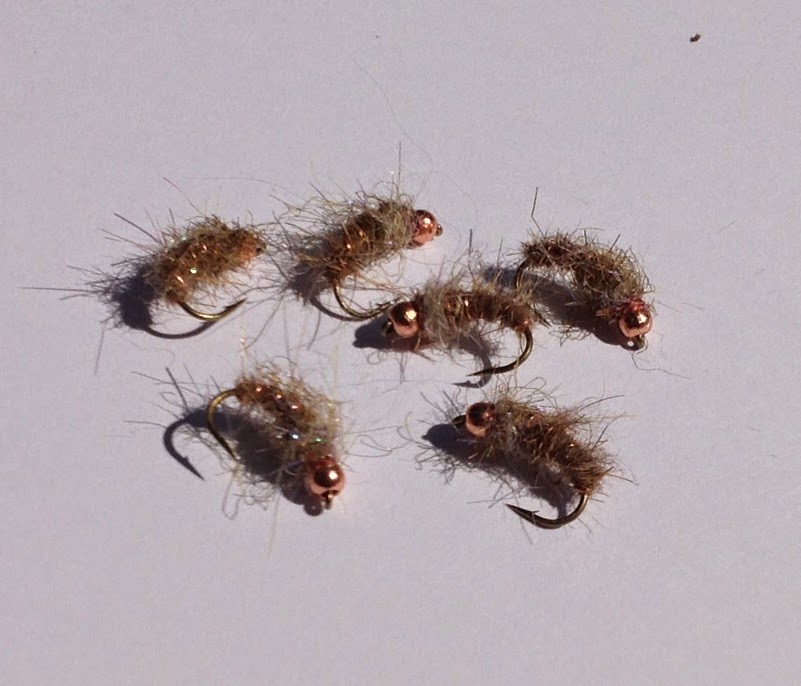
I love to experiment when I tie flies and fly fish.  I’m a very streaky fly fisherman.  Sometimes my experiments pay big dividends.  Sometimes they fail badly.  It’s still all fun.  This is the second month in a row that I’m featuring a fly with purple in it.  Last month it was the Black & Purple Wet Fly.  This month it’s a nymph with purple in it.  Both worked well for me last year on the Housatonic and the Farmington.  This is tied just like a traditional Hare’s Ear.  More times than not I tie it without a wing case, especially when I’m tying it on a jig hook.   This pattern should be tied thin and buggy.  Brush the dubbing out with some Velcro.  I usually use a rainbow colored bead.  These beads have multi colored hues.  There is a lot of purple in them.  Although once difficult to find, more and more fly shops and catalogues have them.  Feel free also to weigh your nymphs if you desire.  Sometimes I tie this pattern with orange thread to create a hot spot just before the bead (as seen in the photo).  Experiment and see what works best for you.
If you have any questions about this fly or would like to submit a pattern of the month I can be reached at 203 305-3850 or e-mail me at pdinice@frontier.com .  

Friday, April 24, 2015

Connecticut - A Great Fly Fishing State! April 24, 2015

I feel so fortunate to have access to such great fly fishing opportunities here in Connecticut.  Last couple of weeks I've been hitting a lot of small streams for trout.  Most have very little fishing pressure and the results have been very good.  The hot fly has been "Torrey's Bead Head Hare's Ear". 

This fly has been magic for me this spring.  So I've been having some great times Trout fishing but the lower Housatonic has been stuck in the "Winter" mode with very cold air and water temps.  Boat fishermen have been hitting nice pods of fish, spin fishermen have landed some nice fish, but wading fly fishermen have not done well this spring.  Well the past few days the river has finally turned on for us fly guys.  In fact the whole river has turned on.  Conditions have been miserable.  Last night after work I went to the river mouth.  It was sleeting, hailing, snowing and raining.  As I was putting on my waders there were wind gusts from 30-35 miles per hour.  4-5 cars full of anglers turned around and went home, not even bothering to get dressed.  I met up with Internet Fishing Star "Bear" Cochrane.  "Bear, in all our years of fishing this has to be one of the worst weather conditions we've ever experienced."  "How many times throughout the years have we had great fishing days when the weather's been miserable."  Had to give it a try.  We walked out to the river mouth with one spin fishermen.  He lasted all of 5 minutes and headed back to his car.  It was just us two crazies left out in the river.  10 minutes later, with unbelievable winds blowing in our faces, Bear and I started hitting fish on virtually every cast.  No keepers, but some really strong fish just in from the ocean.   I got tired of catching fish.  In fact when we left, the bite was still on.  My fingers were numb from the cold and suffering from my first case of "Striper Thumb" this season.  How fortunate are we CT guys to have primo trout fishing opportunities and such a great striper fishery.  And "Oh by the Way", fishing with a friend is the best.
Internet Fishing Star "Bear" Cochrane
with Housy Stripers 


Monday, April 20, 2015

Paul's May 2015 Fly of the Month

Black & Purple


Hook:  Wet Fly hook of choice size #12 to 20.  (I sometimes use dry fly hooks – TMC 100BL works well for this pattern)

Tying thread:   Uni 8/0 in black.
Tail:   3-5 black pheasant tail fibers.
Abdomen:  Black thread forms the abdomen.  After the abdomen is ribbed,  it is coated with “Hard/tough as nails”.
Rib:   Copper wire.
Thorax:  Purple UV Dub.
Legs/hackle:  One or two wraps of black hen neck fibers.
If you haven’t noticed from other Fly of the Month posts, I love black subsurface flies!  This is one of my favorite wet fly patterns. I usually fish it in a double rig with a Hare’s Ear wet fly.  The UV dubbing is like a beacon for trout. 
Start the thread at the eye.  Wrap down the hook to the hook bend.  Tie in your 3-4 pheasant tail fibers approximately the length of the hook shank.  Next, tie in your copper wire to be used for your ribbing.  Build up the abdomen to form a slender body.  Leave enough room to dub a small ball like thorax and the leg/hackle.  After completing the thread body, rib it with copper wire.  Tie and cut the wire off.  Give it a couple coats of “Hard/Tough as nails”.  Next dub your thorax.  Usually a couple wraps of dubbing does the job.  Don’t overdub.  The entire fly should have a slender profile.  Next, tie in your hen hackle by its stripped stem.  Make one or two wraps, tie and cut it off.  Next build up a small head, whip finish and apply head cement. 
If you have any questions about this fly or would like to submit a pattern of the month I can be reached at 203 305-3850 or e-mail me at pdinice@frontier.com . 


Tuesday, March 24, 2015

Paul's April 2015 Fly of the Month

Higa's SOS Nymph


Hook: TMC 2487 or similar, sizes 12-20 (I love it in a size #16 tied small to be more like a size #20 nymph).
Thread: Black, 8/0
Bead:  2.5 mm tungsten.
Tail: 3-4 Black pheasant tail fibers.
Thorax: Black Thread – (For larger flies I use Veevus Iridescent thread.  It has bits of flash in it.)
Rib: UTC ultra silver wire.
Wingcase/shell:  Red floss or UTC holo holographic tinsel.
Abdomen:  Black rabbit dubbing.
Legs:  Black Krystal Flash – two on each side.
Cement:  Coat the wingcase to the bead with head cement or epoxy.
*In my 30 years of doing this, this is one of the best nymph patterns I have ever posted.
This fly was originally tied by a fly fisher from Utah named Spencer Higa.  Spencer is a guide in Utah.  The “SOS” stands for “Saved Our Skins” as it quickly became one of his “go to” flies.   It was originally tied as a baetis imitation but it’s also a great all round attractor nymph.  Initially fished in spring creeks and tail waters, it is a killer for me on the Farmington.   I love to fish it in tandem with another nymph or as a dropper below a dry fly.  You can’t put enough of these in your box !
Begin by placing your tungsten bead on the hook.  Start your thread behind the bead and wrap down a little past the hook barb.  Tie in 3-4 fibers of black dyed pheasant tail.  Now tie in your ultra silver wire ribbing.  Next, form an even body/thorax with your tying thread.  Leave enough room (approximately 1/3 the length of the fly) to dub your abdomen behind the bead.  Rib the body and tie/cut off the silver wire rib.  Next, tie in your floss or tinsel for your wingcase.  Dub your thorax.  Tie in 2 strands of black Krystal flash right behind the bead.  Now fold over your floss/tinsel and tie it off behind the bead.  Your now going to trim you legs (Krystal flash).  There should be two strands per side of the nymph.  Pull the legs to the rear of the fly and trim them just short of the back of the hook.  Finally, put a drop of head cement from the wingcase to the bead to hold things together.  I like to use a small drop of epoxy for durability, a faster sink rate, and added sparkle to the wing case. 
Tightline Productions has a great instructional video on how to tie it.
If you have any questions about this fly or would like to submit a Fly of the Month, I can be reached at 203 305-3850 or e-mail me at pdinice@frontier.com .  This pattern can also be viewed at www.hffa.net .