Wednesday, November 27, 2019

My Favorite Streamers


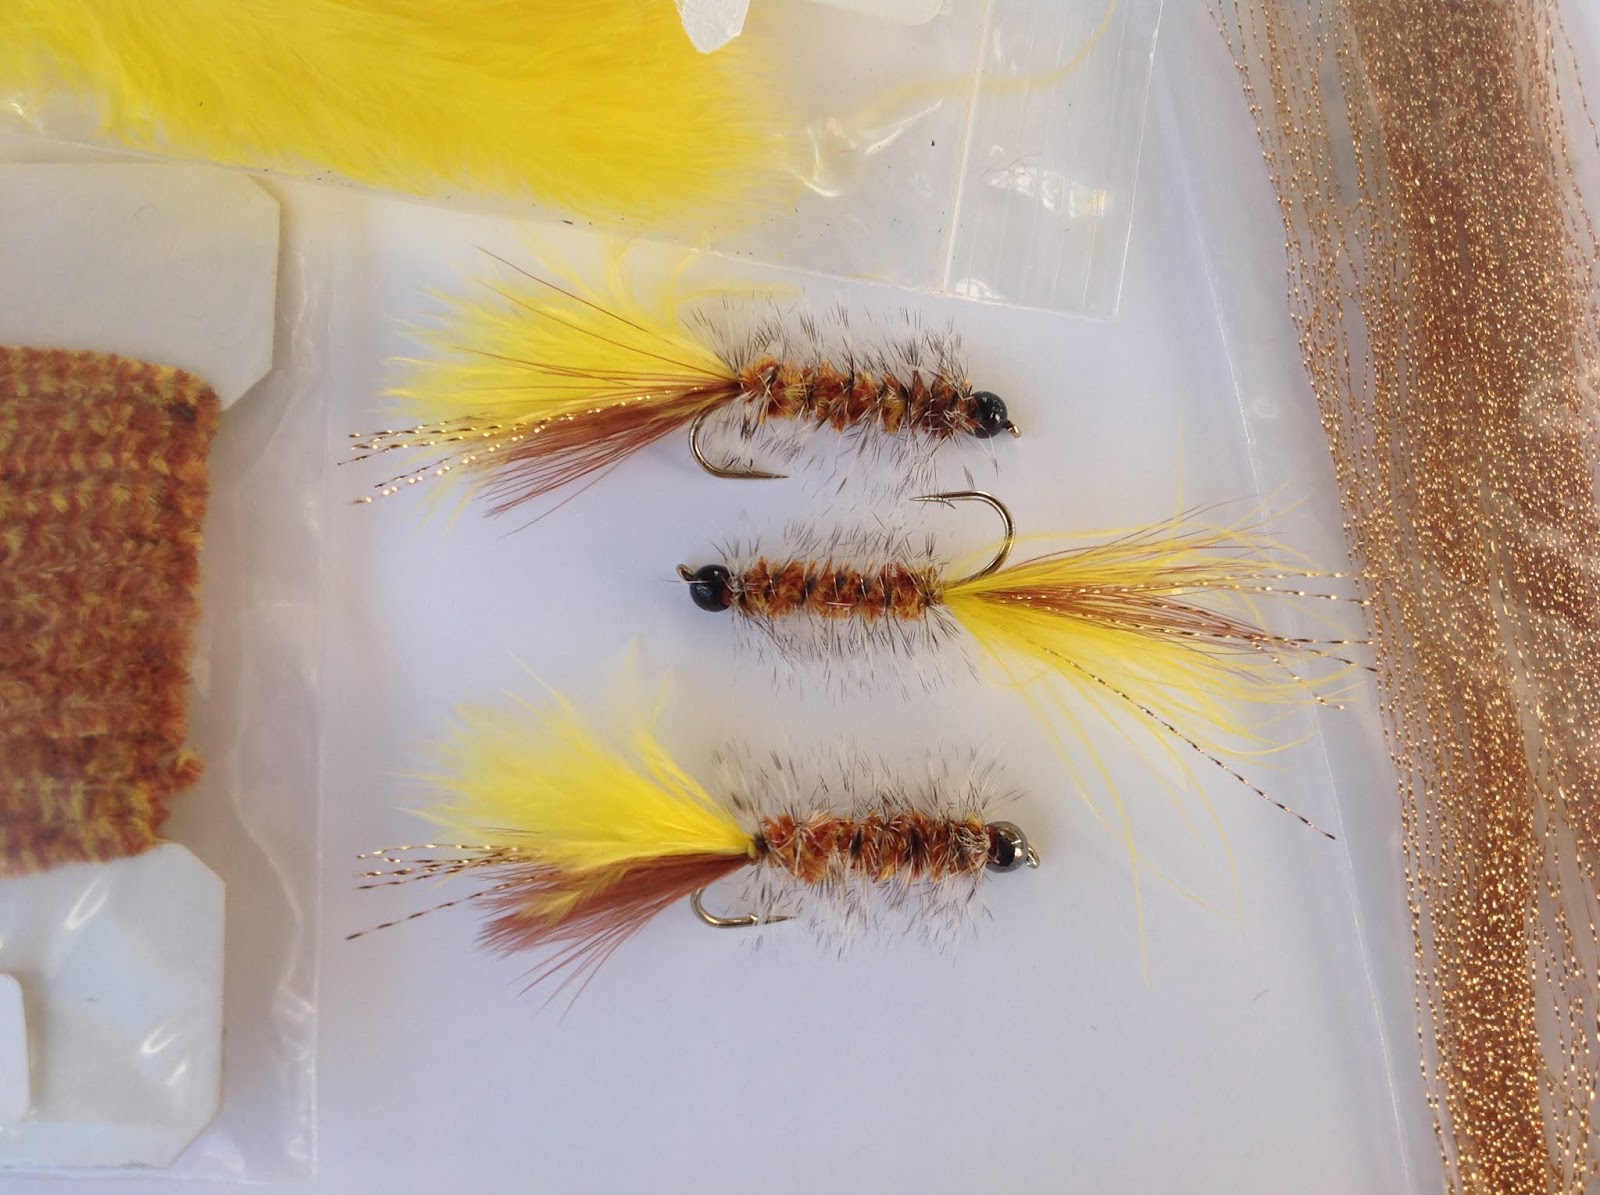
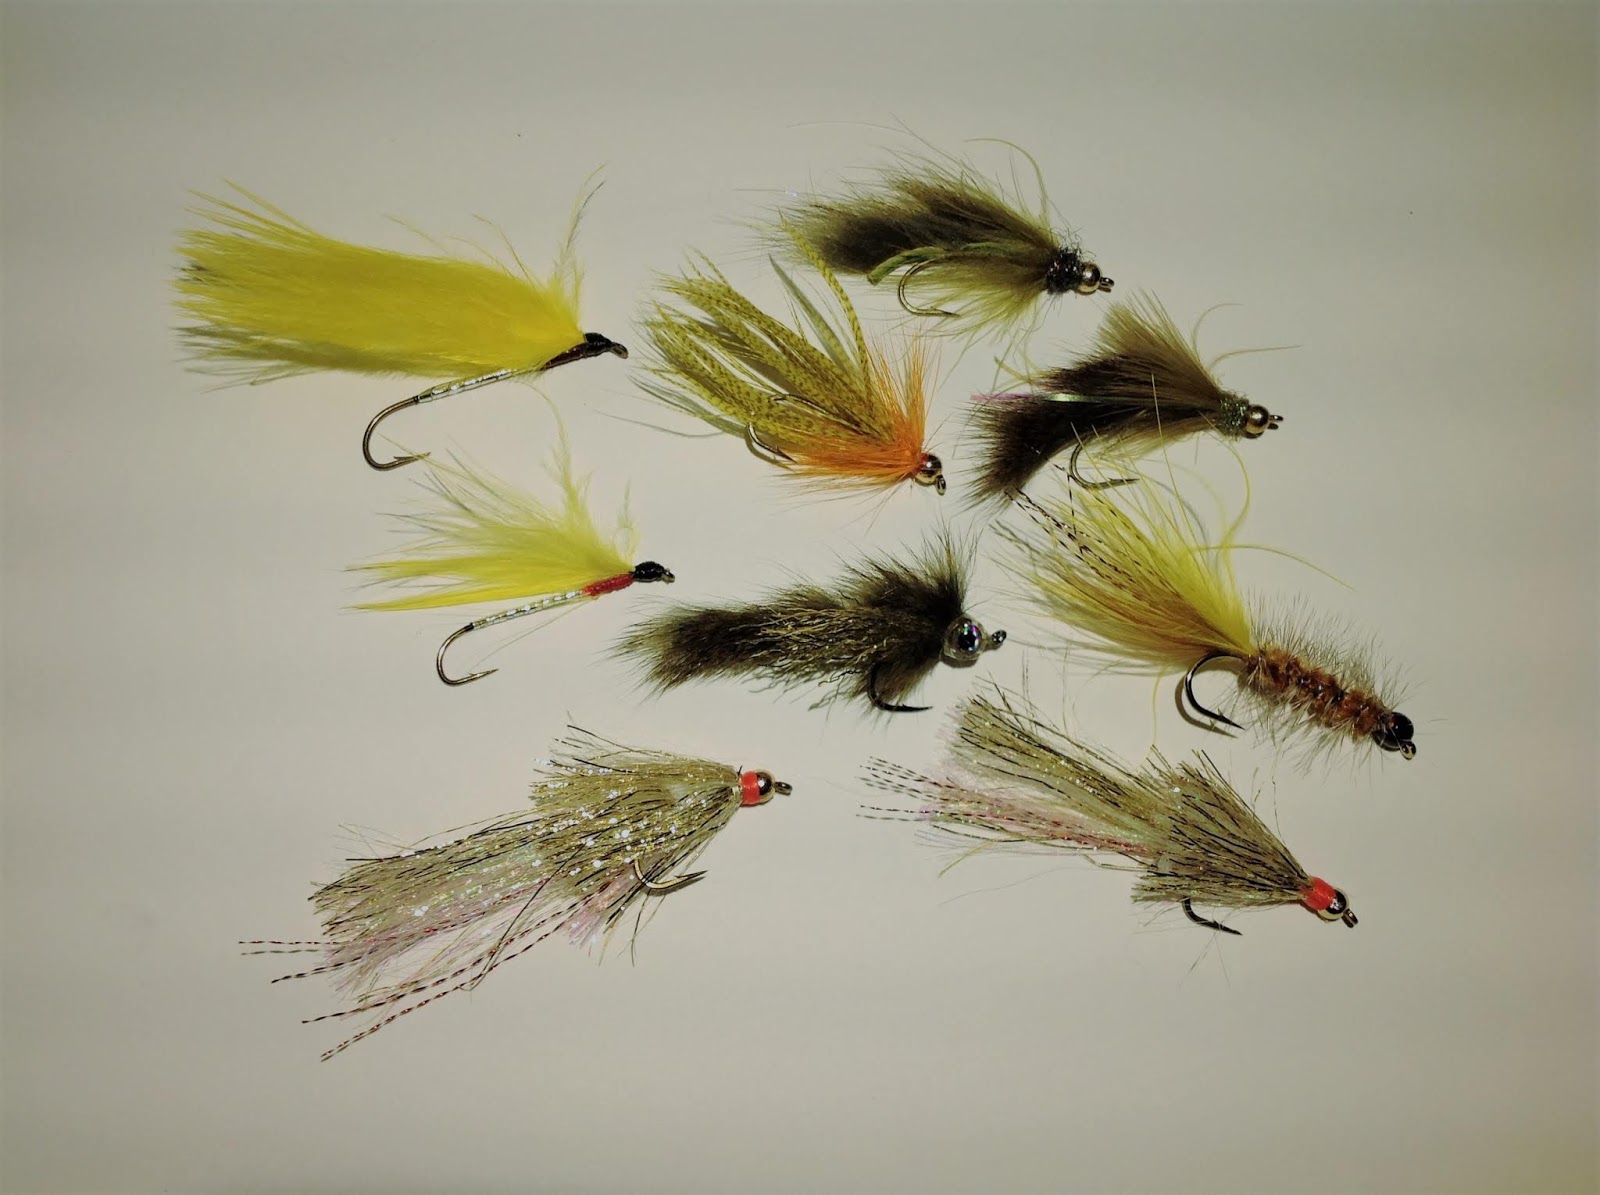
Every winter I try to set fly fishing goals for the upcoming year.  One year I decided to do more May fishing for American Shad.  Another season, I wanted to improve on some Euro-nymphing.  The last few years I wanted to do more fly fishing with friends (always a goal).  This coming year I want to focus on more streamer fishing.  That will be easy.  I love doing it.  While many fly fishers are tying and fishing larger articulated streamers, I've been tying and fishing smaller patterns.  Just my preference.  Some flies included here are the Yellow Mustache, Barr's Bouface in olive (made with a squirrel zonker),  Reece's Masked Bandit (also with squirrel),  Wood Duck Heron Fly in yellow & orange, and finally one of the best, if not the best, Fly of the Month ever, The Goldie.  Now might be the time for you to set your own personal fly fishing goals for the upcoming season.  It's also time to tie up some flies for the upcoming season.  It certainly helps to pass the time to get you through the winter until the warmer fising months arrive.  You can dream of that 'big one' thats going to fall for the fly in  your vice.  Us Fly Guys are very passionate about our sport.  If we're not fly fishing, we're day dreaming about it.  Set your goals for the year to come, tie up the patterns you need, dream about that trophy fish your going to catch!

Saturday, November 23, 2019

Paul's December 2019 Fly of the Month

McKenna's Rumble Bug


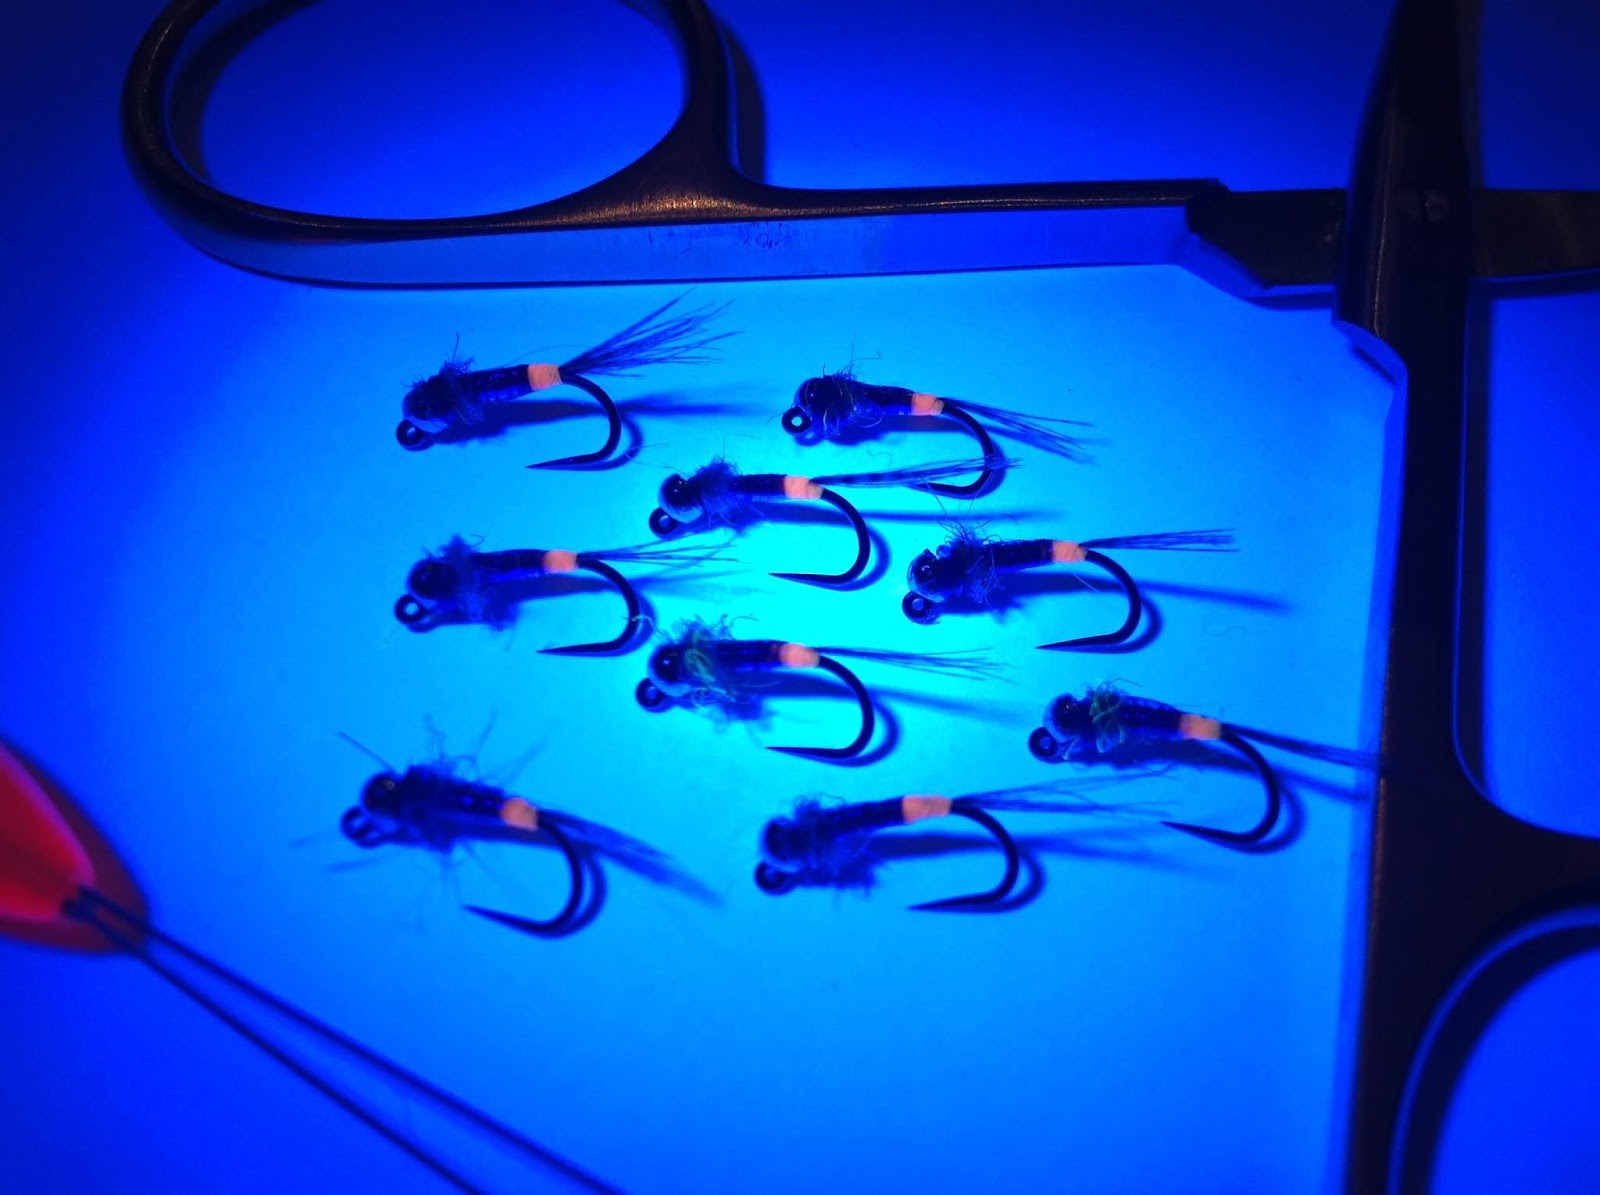
*Special Note – The second picture was taken with a UV light.  You clearly see how vibrant the Glo-Brite Fluorescent Orange thread is.  Also, jig hooks have less shank area than traditional hooks.  A size #16 jig hook is closer to a traditional #18 hook. My preferred size hook for this pattern is a #16 jig hook.

Hook:  Size #14 to #18 barbless jig hook. 
Bead:  Silver slotted Tungsten bead or color of choice.  For a size#16 hook use a 7/64” bead.
Tying Thread:   Orange Glo-Brite Fluorescent thread & Purple Glo-Brite Fluorescent thread . 
Tail:  8-10 Wood duck fibers.
Tag:  Orange Glo-Brite Fluorescent thread.
Body:  A base of Purple Glo-Brite thread with a strand of Pearl Flash-a-bou over wrapped on top of your purple thread.  The Flash-a-bou wraps are then coated with UV Resin.
Collar:  Equal portions of Rainbow Sow Scud Dubbing & Rainbow Senyo Fursion Dub.  

This fly was developed by competition fly fisher Dave McKenna.  It’s kinda’ a cross between a ‘rainbow warrior’ & a ‘lightening bug’.  It works just as well as those two patterns and it’s a euro nymph you definitely want in your box.  It was originally designed to fish the Rumble river in Cherokee North Carolina after it was hit by heavy rains & stained water.

Begin by placing your bead on the hook and mount it in your vice.  Start your Orange Glo-Brite thread immediately behind the bead.  Take a few wraps and cut off the tag end.  Continue to make touching wraps down the hook shank until it lines up with the hook point.  Next, snip off 8-10 wood duck fibers for the tail.  Keep the tips aligned.  Tie in a tail about a hook shank in length.  Your going to wrap a little beyond the hook point when you tie in your tail.  It will become part of your ‘orange tag’.  Wrap your orange thread all the way back up behind the bead.  Whip finish and cut it off.  Now tie in your Purple Glo-Brite thread behind the bead.  Take a few wraps and cut off the tag end.  You’re now going to tie in your strand of Pearl Fash-a-bou.  Continue wrapping down the hook shank leaving a ‘tag end of orange’ at the end of the hook shank.  Bring your thread back up behind the bead.  Make ‘touching’ wraps of the Flash-a-bou over the purple thread and back up behind the hook eye.  Tie and cut off the tag end.   Coat the Flash-a-bou body with a thin layer of UV Resin and cure it with your light.  Next, mix equal amounts of Rainbow Sow Scud dubbing & Rainbow Senyo Fusion Dub. Now dub a slim noodle on your thread and create a short fuzzy collar behind the bead.  You want a minimal collar to ensure that the fly sinks quickly.  Do a 4-5 turn whip finish and your fly is complete. 

Tightlinevideo/Tim Flagler has an excellent instructional video on how to tie this fly below:


If you have any questions about this fly or would like to submit a Fly of the Month I can be reached at 203 305-3850 or at pdinice@frontier.com .  

Wednesday, October 23, 2019

Paul's November 2019 Fly of the Month

Drowned Ant


Hook:  Size #14 to #20 hook.  Diachii 1530 or hook of choice.
Tying thread:   6/0 black, cinnamon brown, or orange thread. 
Body:  Formed by two bumps of thread.  The rear bump slightly larger than the front bump.
Finish:  UV Resin of choice.  Both bumps are coated and cured with UV Resin.
Legs/Hackle:  Black neck hackle.

If you fly fish the Housatonic, or especially if you fish the Farmington, you want to have some ant patterns in your box.  In late August into September, keep on the ‘look out’ for massive ant hatches.  It usually happens right after a rain storm.  Although most fly guys fish floating ant patterns, I love fishing this “Drowned Ant”.  It is a very easy tie, in fact it’s probably the easiest fly to tie that I’ve ever posted.

Start your thread and create a small cylindrical bump behind the eye of the hook.  If you divide the hook into thirds, the front bump will occupy the 1st third of the hook shank.  Next move your thread to the rear third of the fly and create a bump slightly bigger than the front one.  This bump will occupy the rear third of the hook shank.  Tie and clip off your thread.  In between the two bumps there should be a slim layer of thread to be used as a base for your legs/hackle.   Now coat both bumps of the fly with UV Resin.  Cure the resin with your UV light.  Finally, in the middle third of the fly tie in your black hackle for the legs.  Take only one or two wraps.  Tie and clip off your hackle and whip finish your ant. 

I know other ant patterns use dubbing to form the body of the fly.  I like this one because the thread and UV finish has less buoyancy.  The ant sinks better.   Remember, ants come in a few colors.  I tie some black ants, cinnamon brown ants, and orange ants.  I also mix and match colors.  I might tie an ant with a black front bump, and tie the rear of the ant in brown or orange.  My favorite way to fish it is in tandem with a nymph.  The ant is almost always my top fly. 

Jim Misiura has an excellent instructional video on how to tie a drowned ant below:


 One thing he does different than me is apply UV Resin as each segment of the ant is completed.  I find it faster to apply it before tying in my legs.  It also helps to avoid getting resin on my hackle if I apply it  after my ant bumps are completed.


If you have any questions about this fly or would like to submit a Fly of the Month I can be reached at 203 305-3850 or at pdinice@frontier.com .

Tuesday, September 24, 2019

Paul's October 2019 Fly of the Month

Baker's Hole Bugger


Hook:  Size #6 to #12 steamer hook. 
Tying thread:   Brown, 6/0.
Bead:  Optional, color of choice.
Weight:  Lead or lead free wire.
Tail:  Brown marabou on the bottom; then gold Krystal flash; topped byYellow marabou.
Rib:  Gold Wire. 
Hackle:  Grizzly saddle hackle.
Body:  Yellow/brown variegated chenille sized to match hook size. 

This is a very tried and true wooly bugger pattern.  It was originally developed for ‘Baker’s Hole’ on the Madison River, but like most wooly bugger patterns, it works everywhere.     

Begin by placing your bead on the hook if you want to provide some additional weight.   Another option to weight your fly is to make 6-8 wraps of lead or lead free wire at the midpoint of the hook shank.  If you do so, cover those wraps with your thread.  Next, take a clump of Brown Marabou and tie it in at the hook bend for your tail.  I don’t like to make the tails of my woolly bugger too long.  It should be a hook shank length or less.  When tying in the marabou, I trim it to length so that it rests along the entire hook shank.  This lets me give the bugger a nice even body profile.  (This is a little more difficult to do if you use some lead wraps.  It’s why I prefer to use a bead to add additional weight to my buggers.)  On top of the Brown Marabou tie in six strands of Gold Krystal flash.  Next, tie in a clump of Yellow Marabou with the same technique you used for the Brown Marabou.  Now, tie in your Gold Wire rib.  The rib is going to make your bugger much more durable.  Next, tie in your Grizzly Saddle Hackle.  Now tie in your Variegated Chenille.  Palmer the Chenille forward and tie & trim it off behind the eye or bead.  Now, palmer your hackle forward creating even wraps along the hook shank.  At the eye or behind the bead, give it an extra wrap or two.  Next counter wrap your Rib/wire along the hook shank.  Try not to bind down the hackle fibers.  Tie and trim that off behind the eye (or bead if you used one).  Apply some head cement for durability. 

How to fish this fly – You can swing it like a wet fly.  Also retrieve and strip it at various speeds.  If the water is high, I like to use a sink tip line.

If you have any questions about this fly or would like to submit a Fly of the Month I can be reached at 203 305-3850 or at pdinice@frontier.com .


Thursday, August 15, 2019

Paul's September 2019 Fly of the Month

Preston Jennings' Isonychia Nymphs


Preston Jenning’s Isonychia Nymph
Hook:  Size #8, #10, or #12 nymph hook.  Jennings used both sproats and snecked hooks, but a 1 x-long or 2 x-long hook will work.
Tying thread:   Black, 6/0. 
Tail:  Tips of a Partridge feather.  (You can also substitute with Pheasant Tail fibers,     but my favorite tail is 3 Peacock Sword fibers.)
Rib:  Round gold tinsel.
Abdomen:  Seal’s fur (or substitute) dark red and plum, mixed.
Thorax:  2-3 strands of Peacock herl.
Hackle:  Furnace cock hackle, two to three turns.

           Preston Jenning’s Isonychia Nymph Variation
Hook:  Size #8, #10 or #12 nymph hook. 
Tying thread:   Black, 6/0. 
Tail:  3 fibers of Peacock Sword.
Body:  Seal’s fur (or substitute) dark red and plum, mixed. (There is no Peacock Thorax or rib on this version). 
Hackle:  One to two turns of grouse for the hackle.

This is a very traditional and old trout pattern.  Tie and fish it and you’ll be stepping back into Fly Fishing History.  It was developed by a fly fisher named Preston Jennings.  In his day, Preston Jennings was a very well known fly fisherman and tyer.  His book “A Book of Trout” was published in 1935.  It was the first comprehensive guide to the insect life that trout feed on and the patterns that would emulate them.  The book was the first of it’s kind back then and the gold standard by which future books would be measured.   Jenning’s home waters were Catskill Rivers, especially the Esopus Creek.  He was one of the most innovative fly tyers of his time.

Isonychia Nymphs are not like other mayfly nymphs which seek cover on river bottoms.  They are active swimmers.  Often darting from rock to rock even in fast water.  What’s great about fishing these nymphs is their larger size.  Also, their availability from May into October.   

Jennings tied his iso nymphs in a couple of different ways and materials.  I like to tie his ‘traditional’ pattern and tie a lot of them with peacock sword tails (a component of his variation).  What’s great about fly tying is experimenting for what works best for you.

Begin by starting your thread an eye length behind the eye.  Wrap down to the bend of the hook.  Tie in approximately 6-8 fibers of Partridge, about a hook gap length.  (You can also substitute with Pheasant tail or Peacock Sword fibers.)  Next, tie in your gold rib.  You are now going to dub a body of seal or similar Isonychia prepared dubbing.  Begin at the bend of the hook and dub forward leaving enough room behind the eye for your peacock thorax (about an eye’s length & ½ space).  Wrap your rib forward making even spiral wraps.  Tie off your rib and cut off the tag end of it.  Tie in 2-3 stands of peacock herl for your thorax.  Wrap the herl for your thorax.  Approximately 3-4 wraps is all you will need.  Make sure to leave enough space for your hackle.  Next tie in your hackle.  Make 2-3 turns then tie and trim off.  Form a head to the nymph with your tying thread.  Whip finish and trim off your thread.  Finally, apply head cement to the wrapped head.

Tim Flagler of Tight Lines Fly Fishing has an excellent instructional video on how to tie this fly below: 


How to fish this fly – You can fish it as you would any other nymph or you can swing it like a wet fly.  One thing you have to do is to occasionally twitch the fly.  This is a deadly technique on the Catskill streams and it works very well on the Farmington & Housatonic.  You can twitch it with your rod tip or the way I do it, I’ll give it some short fast strips with the line.  As I said earlier, Iso’s are great swimmers darting from rock to rock.  My greatest success has been in the faster water with this fly. 

If you have any questions about this fly or would like to submit a Fly of the Month, I can be reached at 203 305-3850 or pdinice@frontier.com .


Sunday, June 23, 2019

Fly Fishing With Friends III

I originally dedicated this blog to Fly Fishing, Fly Tying, & Friends.  More often than not, I post about Fly Tying.  As I've gotten older and traveled down the path of a 'fly fishing life', what has become most important to me is the time spent fishing with friends.  I treasure all the moments I can spend fly fishing with them. "Many Tides, Many Memories".  I've even developed a presentation called 'The Six Stages of Fly Fishing - A Life's Experience'.  It is a very different program.  Instead of being about catching more fish, or a fly fishing destination, the primary focus is on the fly fisherman.  What is it that drives us to be so passionate about the 'Quiet Sport'.  "Who are we?"  The program examines the various 'stages' in a fly fisherman's life, including the initial discovery of the sport, the need to learn and educate ourselves about it, it's addictive powers, the friendships it has helped us form, the spirituality it has given us, and how it has provided us with a better understanding of where we fit in the world and universe.  I think the video below captures some of that.  At the very least, and most importantly, it shows some of the many friendships I've formed through the sport.  That's most important to me at this time in my life.  For those who have never fished the salt, you might also get an idea of what 'fishing the salt in New England' is like.

Monday, June 3, 2019

Paul's June 2019 Fly of the Month

Skull Head Deceiver


Hook:  Tiemco 600SP size #2 to #4/0, or salt water hook of preference.  
Thread:  White flymaster+ or color matching upper wing color.
Tail:  6 White saddle hackle tied in deceiver style.
Body:  Pearl body braid (wrapped over the hook shank after the tail is applied).
Lower wing:  White buck tail -- two bunches of buck tail are tied in on each side, slightly angled down toward the hook point, extending almost to the tips of your saddle hackle.  Topped with pearlescent Flash-a-bou, or Polar Flash, or flash material of choice.
Upper Wing:  Chartreuse, or olive, or pink, or color of choice buck tailTopped with pearlescent Flash-a-bou, or Polar Flash, or flash material of choice, then topped with peacock or green flash-a-bou.  
Fish Skull:  To match hook size. 


This Fly originally appeared on my blog 9 years ago.  Why repeat it?  Well it's just that good.  The skull head is heavier than most dumb bell eyes on a clouser, getting it down deeper and increasing the 'jigging' action of fly.  I caught a ton of fish using this pattern.  It's one fly I always include to  tie in my HFFA salt water fly tying class.  

Similar to a clouser minnow, the weighted “head” of the fly gives it a jigging action.  What’s great about the “fish heads” is that they can be applied to the hook so that the fly fishes hook point down or inverted like a clouser. 

The key to tying this fly is to make sure you leave enough room to apply the “fish skull” at the end of the tying process.  Begin by advancing your thread from the hook eye to the bend of the hook.  Next, tie in your 6 saddle hackle on top of the hook shank “deceiver” style.  The feathers should extend anywhere from 1 ½ to 2 ½ times the length of the hook shank. Next, tie in your pearl body braid near the bend of the hook.  Palmer it forward and tie off leaving approximately ¼ of the hook shank to the eye.  I then coat it with ‘tough as nails’ for added durability.  You can also take time to test that your “fish skull” will fit properly over the eye of the hook.  I usually do this a couple times during the tying process. Next tie in two bunches of white buck tail on each side of the hook shank.  They should be a little shorter than the tail, and slightly angled down.  Top the lower wing/tail with pearlescent Flash-a-bou or Polar Flash.  It should extend to the tip of the tail.  Next, tie in your upper wing (chartreuse, olive, or color of choice).  It should also extend to the tip of the tail.  Top with more pearlescent Flash-a-bou.  Finally top it with peacock or dark green Flash-a-bou.  You’re now ready to apply your “fish skull”.  Tie off your thread.  Before applying the “fish skull” to the hook shank, coat the contact area with head cement or adhesive of choice.  Follow the “fish skull” directions.  Depending upon how you affix it to the hook shank,  the fly will either fish with the hook point down, as any traditional fly would, or you can apply it to the hook shank so your fly will fish inverted just as a traditional clouser would.  If you tied the fly properly, the eye of the hook will extend just beyond the fish skull.  Re-apply and make a number of wraps with your thread just before the hook eye, then tie it off again.  Apply head cement.  This is to further ensure that the “fish skull” will stay permanently affixed to the hook.  (I’ve never had one loosen up on me yet, but this is the manufacturer’s recommended tying method.)  I don’t know if this fly out fishes clousers, but they sure work.  Only drawback is they aren’t cheap.  

Below is a great video of friend Mike Shannon landing a Cape Cod Striper on the 'Skull Head'.  


If you have any questions about this fly or would like to submit a Fly of the Month I can be reached at 203 305-3850 or e-mail me at pdinice@frontier.com .