
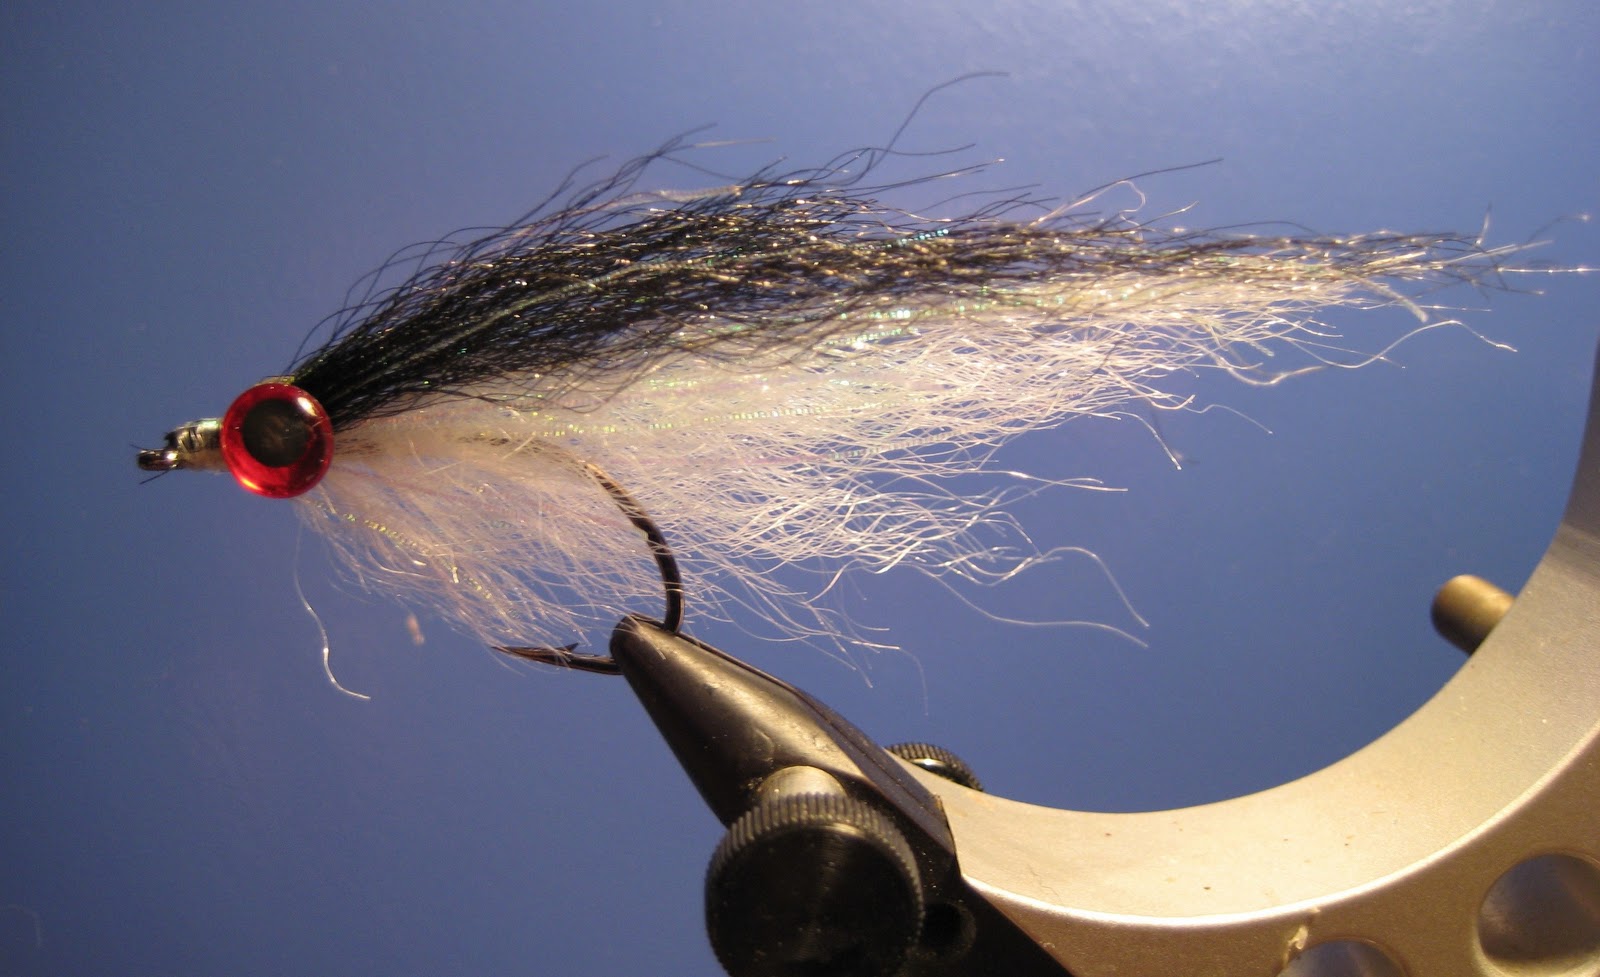
Bear’s Bunker
Hook – Mustad #34007 or salt water hook of preference, sizes #2 to #5/0.
(I like using Gamakatsu B10S or Tiemco 600 SP)
Thread – Clear monofilament.
Body – Flash n’ Slinky.
Wing – Flash n’ Slinky (Optional - add flash material of choice,
angel hair, etc.)
Eyes – 3D molded eyes or stick on eyes.
Epoxy – Over eyes and head of the fly.
This fly is actually an improved and advanced version of what was previously known as “Bear’s Big Yak Attack”. There was a time when I would never tie or fish flies comprised primarily of artificial materials. I preferred to fish large deceiver type “grocery flies”. Some of the newer materials now available have changed my mind. These “new” materials, with their iridescent silhouette, catch fish like crazy. This pattern is so versatile it can imitate the complete range of bait fish, from silversides, to peanut bunker, to bay anchovies. This is an easy fly to tie. It just takes a little practice. Each one is like your own personal little sculpture and will reflect your tying “style”.
Begin by tying in a length of flash n’ slinky approximately 1 ½ to 2 times the hook shank length at the bend of the hook. (Be sure to roll the material in your fingers and make sure the fibers are tapered and uneven, or your fly will be comprised of “straight cut” sections of material.) Tie it in at the bend of the hook. The material tends to spin. Hold it in place until it’s secured. Next, invert your fly in the vice. Tie in a length of material on the bottom of the hook shank. It should be tied in at a 45 degree angle, approximately 2/3 the length of the tail. When applying it must be split to have equal portions on each side of the hook bend. Keep your hook inverted. Next, tie in your belly, 2-3 segments, again at a 45 degree angle. Length should extend from the hook shank to the hook point. Invert your fly back to the conventional tying position. At this point you might want to coat the hook shank with flex-cement for durability. Tie in your sides to the fly deceiver style along the hook shank. The sides should extend a little past the bend of the hook. Add your first layer of wing material. I usually tie the belly of the fly in white, and use a darker color for the wing. It should extend slightly past the tail of the fly. Apply a second layer of wing material, same length. When applying the wing you can add additional flash material if you so desire. I sometimes use angel hair. Finally, add your last segment of material on top of the wing, approximately ½ the length of the wing. Apply 3D molded eyes. Epoxy eyes and the head of the fly. Color combinations that produce are olive and white, orange and white, black and white, all black (killer at night), and all white in small sizes (this is a great Albie Fly!) An instructional video on this fly can be viewed below:
If you have any questions about this fly e-mail me at pdinice@frontier.com .
No comments:
Post a Comment